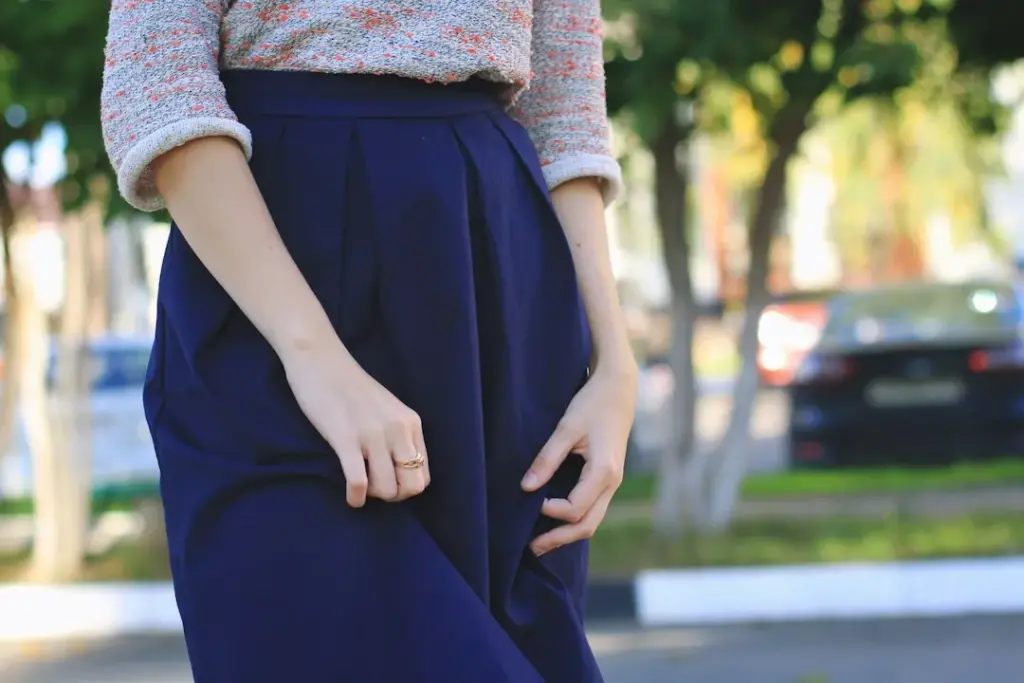
Effortlessly Mastering the Art of Ironing a Pleated Skirt
Ironing a pleated skirt might seem like a daunting task, but with the right approach, it can be effortlessly mastered. From choosing the right iron to dealing with difficult fabrics and using steam effectively, there are several key steps to achieving perfectly ironed pleats. In this guide, we will walk you through the process of preparing and ironing a pleated skirt to perfection. Whether you’re a beginner or simply looking to refine your ironing skills, this comprehensive tutorial on how to iron a pleated skirt will equip you with the knowledge and techniques needed to achieve professional results.
Choosing the Right Iron
When it comes to ironing a pleated skirt effectively, selecting the right iron is crucial for achieving the best results. Here are some key points to consider when choosing the right iron:
Steam Functionality: Opt for an iron with a powerful steam function to effectively smooth out the pleats and remove any stubborn wrinkles. The steam helps in relaxing the fabric and makes the pleats easier to iron.
Temperature Control: Look for an iron with adjustable temperature settings, especially if the pleated skirt is made of different fabrics. This feature allows you to set the appropriate heat level for different fabric types, preventing any damage to the pleats.
Soleplate Material: Consider irons with non-stick or ceramic soleplates to prevent the pleats from sticking or shining due to excessive heat or steam.
Precision Tip: An iron with a precision or narrow tip is beneficial for ironing pleats, especially in intricate or small pleated areas.
Choosing the right iron with these features will make the process of ironing a pleated skirt much more manageable and effective, ensuring that the pleats remain crisp and well-maintained throughout the process.
By selecting an iron with the right features, you can significantly simplify the process of ironing a pleated skirt, ensuring that the pleats are perfectly maintained without any damage to the fabric.
Remember, the right iron can make the entire process of ironing a pleated skirt a smooth and efficient experience.

Setting Up Your Ironing Station
Before you begin ironing your pleated skirt, it’s essential to set up your ironing station properly. Here’s how to ensure you have everything you need to achieve perfectly pressed pleats:
Choose the Right Surface: Select a sturdy, flat, and clean surface for ironing. A dedicated ironing board is ideal, but a flat table covered with a thick, smooth cotton cloth can also work well.
Adjust the Iron Settings: Depending on the fabric of your pleated skirt, set the appropriate heat and steam settings on your iron. For delicate fabrics, use a low heat setting to avoid damage.
Fill the Iron with Water: If your iron has a steam function, ensure it is filled with clean water. The steam will help in removing wrinkles and achieving crisp pleats.
Organize Your Tools: Keep a spray bottle filled with water nearby to dampen stubborn wrinkles. Additionally, have a pressing cloth or a piece of plain cotton fabric on hand to protect the pleats while ironing.
By setting up your ironing station thoughtfully, you’ll create an efficient and effective environment to iron your pleated skirt without any hassle.
Remember, a well-prepared ironing station is the foundation for achieving beautifully ironed pleats in your skirt.
Preparing the Pleated Skirt
Before you start ironing, it’s crucial to properly prepare the pleated skirt to ensure the best results. Here’s how to do it:
Check the Fabric Care Label: Refer to the fabric care label to determine the appropriate ironing temperature. Different fabrics require different heat settings, and following the manufacturer’s guidelines will prevent accidental damage.
Smooth Out Any Wrinkles: Gently smooth out any wrinkles or creases in the skirt using your hands. This will make the ironing process much more effective and will help maintain the pleats’ crisp appearance.
Turn the Skirt Inside Out: For delicate fabrics, consider turning the skirt inside out to iron. This can help prevent direct contact between the iron and the outer surface of the fabric, reducing the risk of shiny spots or damage.
Use a Pressing Cloth (if necessary): If the fabric is particularly delicate, place a clean pressing cloth over the pleats before ironing. This extra layer of protection will shield the fabric from direct heat and prevent any potential damage.
By properly preparing the pleated skirt before ironing, you set the stage for a successful and effective ironing process, ensuring that the pleats remain sharp and well-defined.
Remember, taking a little extra time to prepare the skirt can make a significant difference in the final result when following the steps for “how to iron pleated skirt”.
Ironing the Pleats
Ironing pleats in a skirt can be a bit tricky, but with the right technique, you can achieve perfectly pressed pleats. Here’s how to iron pleated skirt effectively:
Start from the Inside: Turn the skirt inside out to protect the fabric and prevent any shine from developing on the pleats.
Use a Pressing Cloth: Place a damp pressing cloth over the pleats to protect the fabric from direct heat. This also helps in creating steam, which is beneficial for pressing the pleats.
Set the Iron Temperature: Make sure to set the iron to the appropriate temperature for the fabric of the skirt. Use a low to medium heat setting for delicate fabrics and a higher heat setting for sturdier materials.
Ironing Technique: Gently press the iron onto the pleats, starting from the top and working your way down. Avoid sliding the iron back and forth, as this can flatten the pleats.
Check and Adjust: Periodically check the pleats to ensure they are being pressed evenly. Make any necessary adjustments to avoid creases or uneven pleats.
By following these steps on how to iron pleated skirt, you can maintain the crispness and structure of the pleats, keeping your skirt looking impeccable.

Dealing with Difficult Fabrics
Ironing pleated skirts can become trickier when dealing with delicate or difficult fabrics. Here’s how to handle these fabrics effectively:
Low Heat Setting: For delicate fabrics such as chiffon or silk, use a low heat setting on your iron. This will prevent damage to the fabric while still effectively removing wrinkles.
Use a Pressing Cloth: When dealing with fabrics that are prone to shine or burn marks, it’s essential to use a pressing cloth. Place the pressing cloth over the fabric before ironing to provide a protective barrier.
Test in an Inconspicuous Area: Before ironing the entire pleated skirt, test a small, inconspicuous area to ensure that the fabric can withstand the heat of the iron without damage.
Vertical Steaming: If the fabric is extremely delicate, consider using a vertical steaming function instead of direct ironing. This gentle method can help release wrinkles without direct contact with the fabric.
By following these tips, you can effectively iron pleated skirts made from difficult fabrics without compromising their quality or appearance.
Using Steam Effectively
When it comes to ironing a pleated skirt, using steam effectively can make a significant difference in achieving that perfectly pressed look. Here’s how to make the most of steam while ironing:
Fill the Water Tank: Before starting, ensure that your iron’s water tank is filled to the recommended level to produce an adequate amount of steam.
Adjust the Steam Settings: Set your iron to the appropriate steam setting based on the fabric of the pleated skirt. Higher steam settings work well for heavier fabrics, while lighter fabrics may require less steam.
Hang the Skirt: To effectively steam the pleats, consider hanging the skirt vertically. This allows the steam to penetrate the fabric and relax the wrinkles more efficiently.
Use a Pressing Cloth: For delicate fabrics, using a pressing cloth can protect the fabric from direct contact with the iron while allowing the steam to work its magic.
Evenly Steam the Pleats: Work methodically to steam each pleat evenly, starting from the top and moving downwards. Avoid lingering in one spot for too long to prevent over-wetting the fabric.
By using steam effectively, you can ensure that the pleats on your skirt are well-defined and wrinkle-free, giving it a polished and professional appearance.
Remember, the key is to control the steam and heat to avoid damaging the fabric while achieving the desired results.
Using these techniques will help you master the art of ironing a pleated skirt without compromising the fabric or the pleats.
Maintaining the Pleats
When it comes to maintaining the pleats of your skirt after ironing, it’s essential to handle it carefully to avoid undoing all your hard work. Here’s how to maintain the pleats effectively:
Proper Storage: Store your pleated skirt by hanging it up or folding it gently to prevent the pleats from flattening out.
Avoid Overwashing: Washing your pleated skirt too frequently can weaken the pleats. Spot cleaning or using fabric refreshers can help maintain the pleats without subjecting the entire skirt to a wash.
Gentle Handling: Be mindful of how you handle your pleated skirt. Rough handling can disrupt the pleats, so handle with care.
Steam Touch-Ups: If you notice the pleats starting to lose their crispness, use a garment steamer or hang the skirt in a steamy bathroom to refresh the pleats without ironing.
Professional Care: For intricate or delicate pleats, consider professional dry cleaning to maintain the pleats’ integrity over time.
By following these maintenance tips, you can keep your pleated skirts looking sharp and well-pressed, ensuring that your efforts in ironing don’t go to waste.
Finishing Touches
When you have finished ironing your pleated skirt, it’s important to give it the final touches for a polished look. Here are some tips on how to ensure your pleats look perfect:
Hang the Skirt: After ironing, hang the skirt on a hanger to prevent the pleats from getting flattened again.
Allow Cooling Time: Let the skirt cool down for a few minutes before wearing it. This helps to set the pleats in place.
Store Carefully: When storing the skirt, avoid folding it in a way that would flatten the pleats. Hanging it in a garment bag is ideal for preserving the pleats.
Check the Hemline: Ensure the hemline is even and there are no wrinkles at the bottom of the skirt.
Touch-Up as Needed: If you notice any areas that still need attention, use the iron to touch up specific pleats or sections.
Remember, with these finishing touches, your pleated skirt will maintain a crisp and elegant look, leaving you feeling confident and stylish.
By following these steps, you’ll effortlessly master the art of ironing a pleated skirt, keeping it in impeccable condition for every wear.
Frequently Asked Questions
What is the best way to iron a pleated skirt?
The best way to iron a pleated skirt is to use a low to medium heat setting on your iron and to press the skirt gently without flattening the pleats. You can also use a pressing cloth to protect the fabric and maintain the pleats as you iron.
Can I iron a pleated skirt with steam?
Yes, you can use steam to iron a pleated skirt. However, it’s important to use the steam function of your iron carefully and avoid saturating the fabric with too much steam. The goal is to gently remove wrinkles without causing the pleats to lose their shape.
Should I iron my pleated skirt inside out?
It’s best to iron your pleated skirt inside out to protect the outer surface of the fabric and preserve the crispness of the pleats. This method also minimizes the risk of leaving shiny iron marks on the fabric.
How should I store a pleated skirt to prevent wrinkles?
To prevent wrinkles, you should hang your pleated skirt using a soft padded hanger with clips, making sure to clip the waistband and avoid creasing the pleats. If you need to fold and store the skirt, use tissue paper to protect the pleats and minimize creasing.